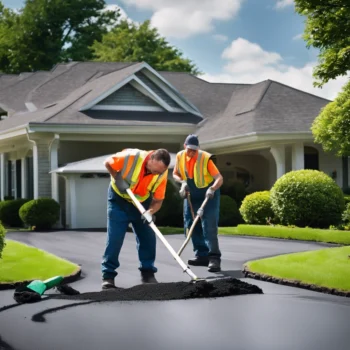
Driveway Crack Repair
Repairing cracks in your driveway is not only important to keep your driveway looking good and serving you well. In addition to maintaining the curb appeal of your home regular driveway maintenance can also help you avoid additional costly repairs.
Prevent Further Damage: Repairing cracks early prevents water from seeping into the asphalt, which can cause larger cracks, potholes, and more extensive damage over time.
Extend Driveway Life: Regular crack repair helps maintain the structural integrity of the driveway, extending its lifespan and delaying the need for a complete replacement.
Improve Appearance: Filling cracks improves the appearance of your driveway, giving it a smoother, more uniform surface.
Cost-Effective: Addressing cracks promptly is a cost-effective way to maintain your driveway, avoiding more expensive repairs or replacement in the future.
The process of repairing cracks in an asphalt driveway is something that is best left to professionals such as those at Ashburn Driveway Repair.
The Process of Asphalt Driveway Crack Repair is extensive
1. Inspection:
- Assess the Cracks: The first step is to inspect the driveway and assess the size, depth, and extent of the cracks. This helps determine the appropriate repair method.
2. Surface Preparation:
- Cleaning the Cracks: The cracks are thoroughly cleaned to remove any dirt, debris, vegetation, and loose asphalt. This can be done using a wire brush, a screwdriver, or a high-pressure air blower to ensure that the filler adheres properly.
- Drying: The cracks need to be completely dry before applying the filler. If necessary, a heat gun or torch can be used to remove any moisture.
3. Filling the Cracks:
- Selecting the Filler: Depending on the size and type of crack, different materials such as cold pour crack filler, hot pour rubberized sealant, or asphalt patching compound are used.
- Application: The filler is applied directly into the crack. For small cracks, a pourable crack filler is often used. For larger cracks, a hot rubberized sealant or asphalt patching compound may be applied using a trowel or putty knife to ensure it’s packed tightly.
- Smoothing: After filling the crack, the surface is smoothed out to ensure it is level with the surrounding asphalt. This can be done with a trowel or a scraper.
4. Curing and Setting:
- Drying Time: The filler needs time to cure and set. The drying time can vary depending on the product used and weather conditions, but it generally takes a few hours to a full day.
- Optional Sealing: Once the crack filler has fully cured, a layer of asphalt sealer can be applied over the repaired area for added protection and to blend the repair with the rest of the driveway.
5. Final Inspection:
- Checking the Repair: The driveway is inspected after the filler has cured to ensure the repair is successful and the cracks are properly sealed.
