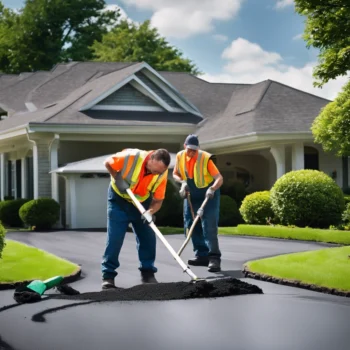
Driveway Sealing explained
Ashburn Driveway Repair uses an extensive process when sealing driveways which is conducted in accordance with industry best practices. The process includes surface preparation, edge protection, sealant application, drying and curing time, and is concluded with a final inspection.
1. Surface Preparation:
- Cleaning: The driveway surface is thoroughly cleaned to remove dirt, debris, oil stains, and vegetation. Power washing is often used to ensure a clean surface for the sealant to adhere properly.
- Crack Filling: Any cracks or potholes are filled with a suitable filler or patching compound. This step is crucial as it prevents further damage and ensures a smooth finish.
2. Edge Protection:
- Masking: Areas adjacent to the driveway, such as sidewalks, curbs, and landscaping, are protected using masking tape or plastic sheeting to prevent accidental application of the sealant.
3. Application of Sealant:
- Choosing the Sealant: A high-quality asphalt-based sealant is selected based on the driveway’s condition and local climate.
- Mixing the Sealant: The sealant is mixed according to the manufacturer’s instructions to achieve a consistent texture.
- Application: The sealant is applied in thin, even layers using a squeegee, brush, or sprayer. Care is taken to cover the entire surface uniformly, including edges and corners.
4. Drying and Curing:
- Drying Time: After the application, the driveway is left to dry. Depending on the weather and sealant type, this can take anywhere from a few hours to 24 hours.
- Curing: The sealant needs time to cure fully, which may take several days. During this period, the driveway should be kept free of heavy traffic and sharp objects.
5. Final Inspection:
- Inspection: Once the sealant has dried and cured, the driveway is inspected for any missed spots or uneven areas, which are then touched up if necessary.
Why Driveway Sealing is Recommended
**1. Protection Against Weathering:
- Driveway sealing creates a protective layer that shields the surface from the damaging effects of rain, snow, and UV rays. This helps prevent the breakdown of the asphalt binder, which can lead to cracks and erosion.
**2. Prevention of Water Damage:
- Sealing fills in the small pores and cracks in the driveway, preventing water from seeping in. Water infiltration can cause significant damage, especially in colder climates where freeze-thaw cycles can lead to cracks and potholes.
**3. Enhanced Appearance:
- A freshly sealed driveway looks new and well-maintained, which boosts the curb appeal of your property. The sealant gives the surface a rich, black finish that hides minor imperfections and stains.
**4. Extended Lifespan:
- Regular sealing can extend the life of your driveway by preventing the need for more extensive repairs or replacement. It helps maintain the structural integrity of the driveway by protecting it from environmental damage and wear and tear.
**5. Cost-Effective Maintenance:
- Sealing is a relatively low-cost maintenance task compared to the cost of repairing or replacing a damaged driveway. Regular sealing helps avoid costly repairs and prolongs the time between major resurfacing or replacement.
**6. Resistance to Chemical Spills:
- Driveway sealant provides a barrier against oil, gasoline, and other chemicals that can stain or degrade the asphalt surface, keeping it in better condition for longer.
By following a regular sealing schedule—typically every 2 to 3 years—you can ensure your driveway remains in good condition, saving money in the long run and maintaining your property’s value.
